Contribute Data
The Amphibian Disease Portal uses the GEOME platform to validate and upload your data. It will perform data validation and hosts all data that is accessible on the Amphibian Disease Portal. These steps are completely new from the previous version so please review the following steps for registering as a user, creating projects and loading data.
Table of Contents
Creating a User Account
Creating Projects
Generating a Template & Uploading Data
More Tips and Guidelines for the Data Fields
Creating a User Account
- 1. Navigate to GEOME
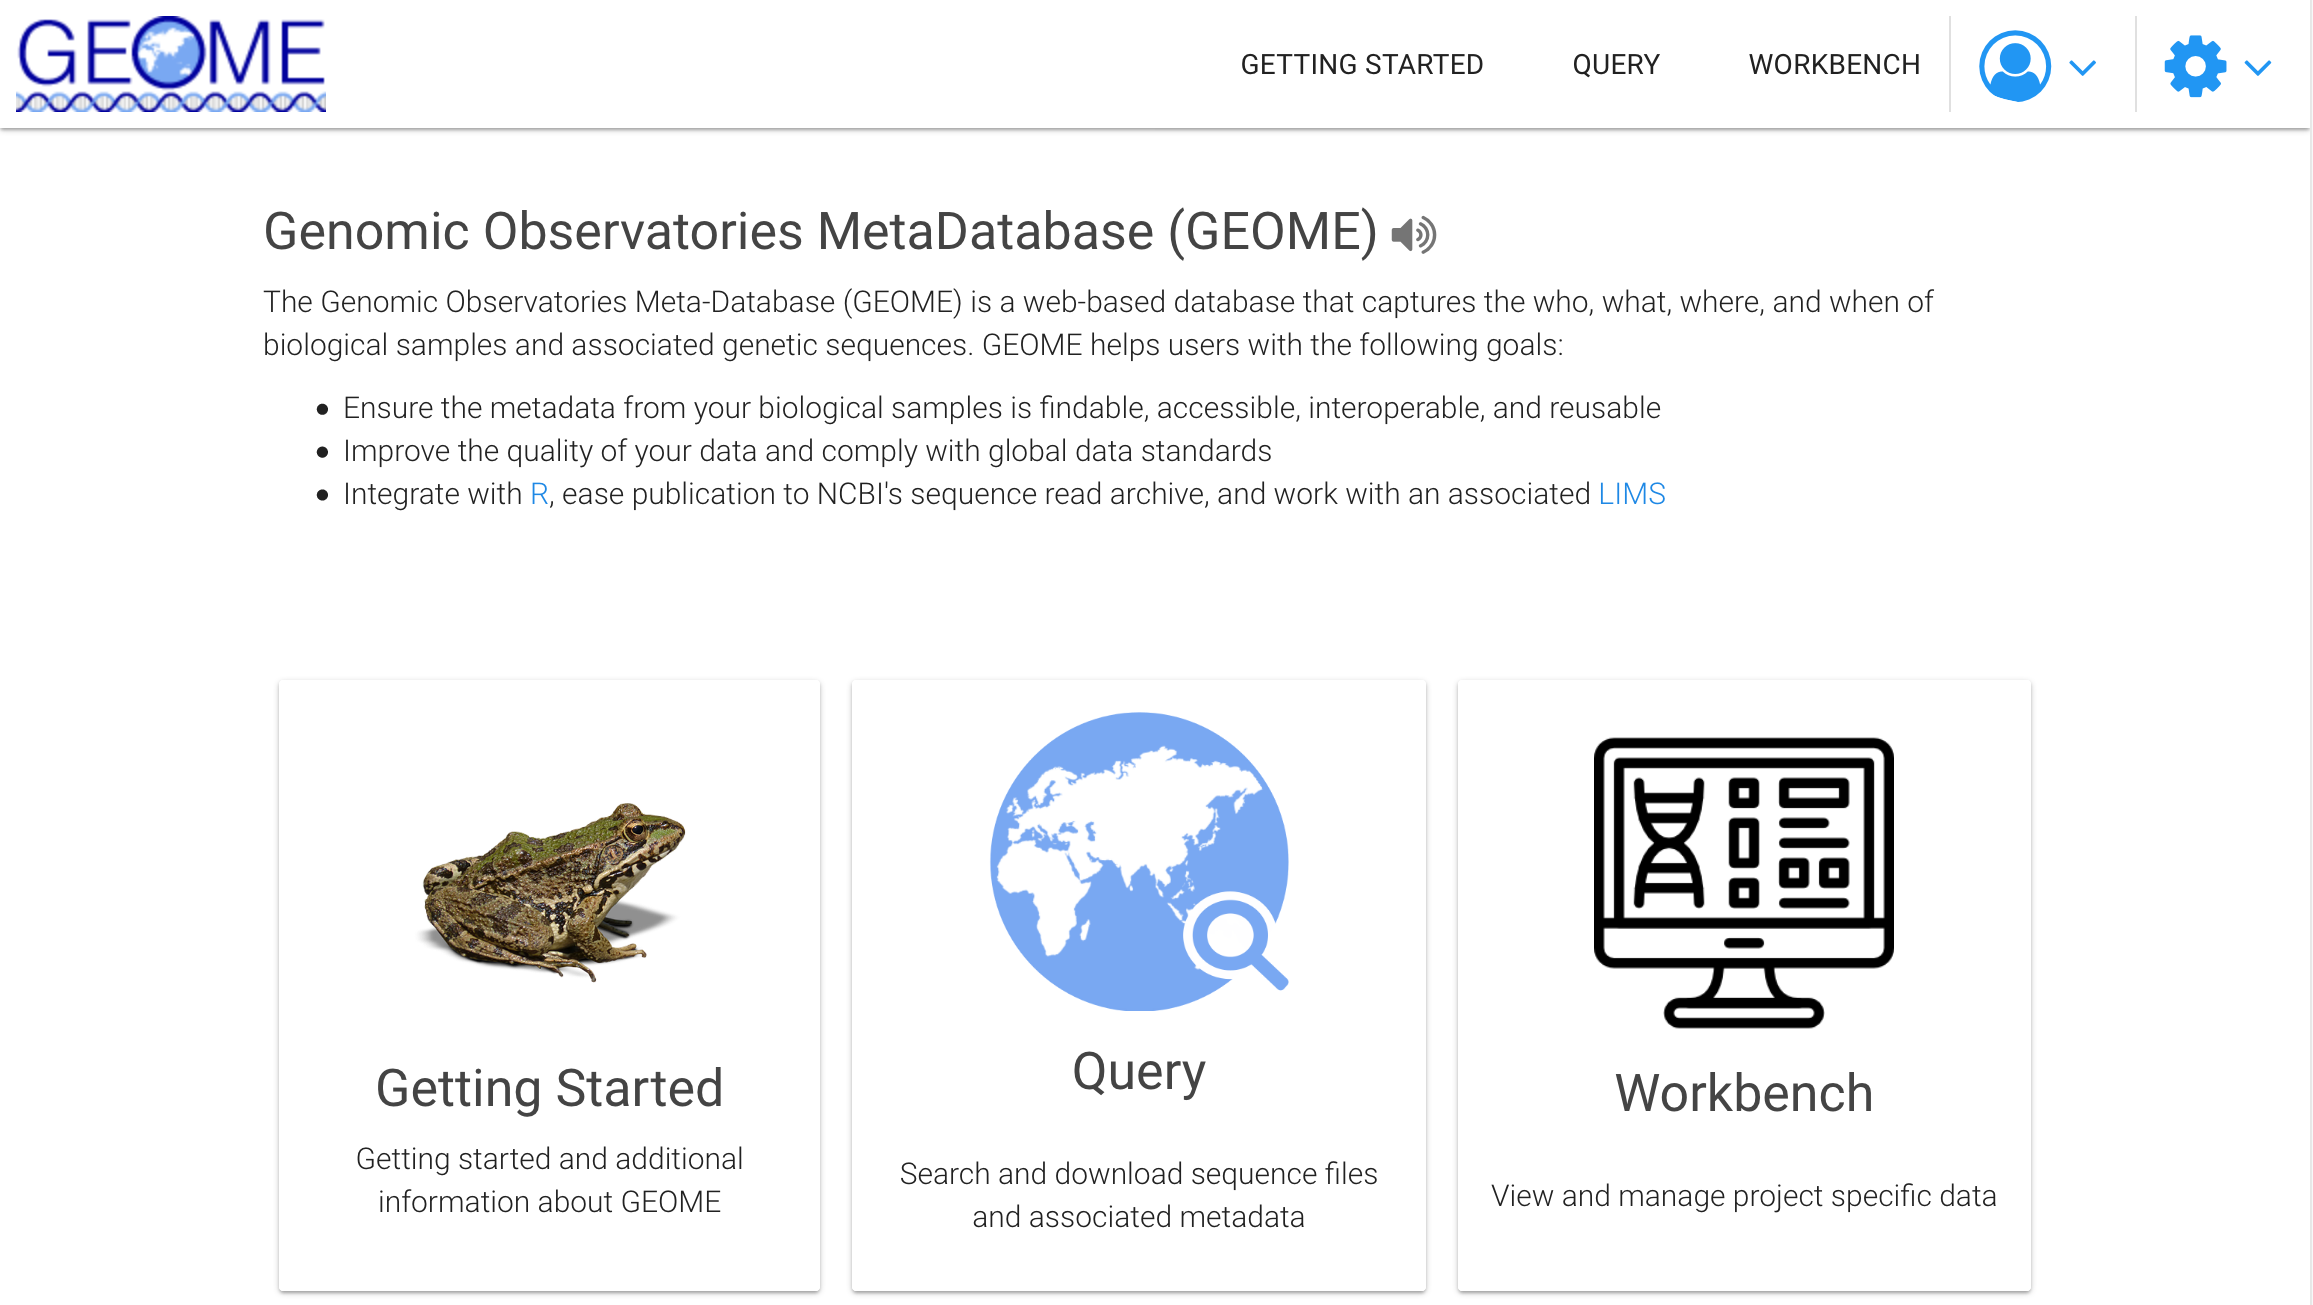
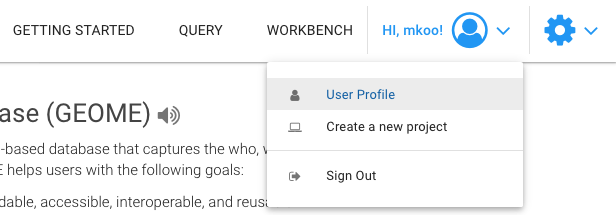
- 2. Create an account if you do not already have one. (Previous users of the Amphibian Disease Portal will have received notice of their user accounts being migrated over) Click on the dropdown arrow by the Profile icon to Create Account.
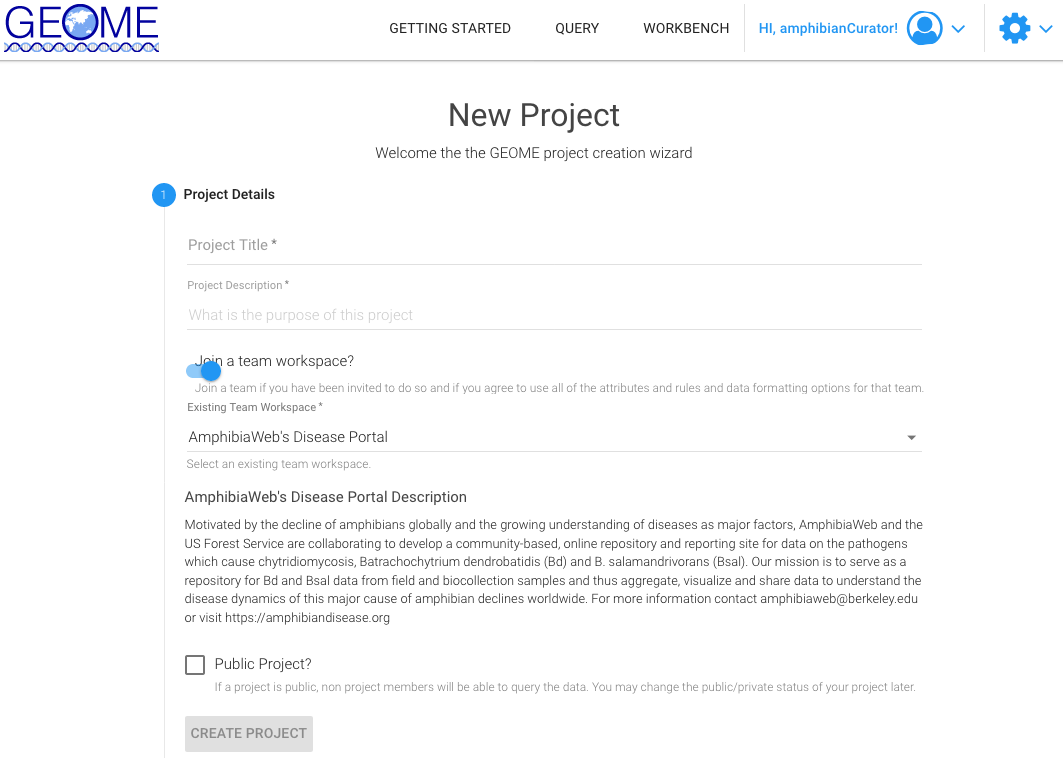
- 3. After logging in, select Create a new project from the dropdown menu.
- 4. Creating a New Project will require the following:
- Project Title (concise and descriptive is helpful).
- Project Description (this can be the Abstract from a paper if associated with a publication or a brief description of the purpose and goals of your project).
- Join a Team Workspace by toggling the Join button to on and selecting the Team Workspace "AmphibiaWeb's Disease Portal".
- Check the box whether it should be a public project. Leave unchecked to keep private.
- Click Create Project to initiate.
- 5. Once your project is created, go to "Project Settings" on the left side menu (under Admin) to fill out the additional project metadata fields.
- Here, you can edit the Title, Description, Visibility of public or private.
- Other critical metadata to fill out include:
- Principal Investigator
- PI Affiliation
- Project Contact (can be different or the same as PI)
- Project Contact Email
- 6. Project Details may be added or edited by clicking Project Settings on the left menu. In addition to editing the above fields, you will be able to provide:
- Publication GUID (or DOI provided by the publication journal)
- Project Data GUID
- Recommended citation
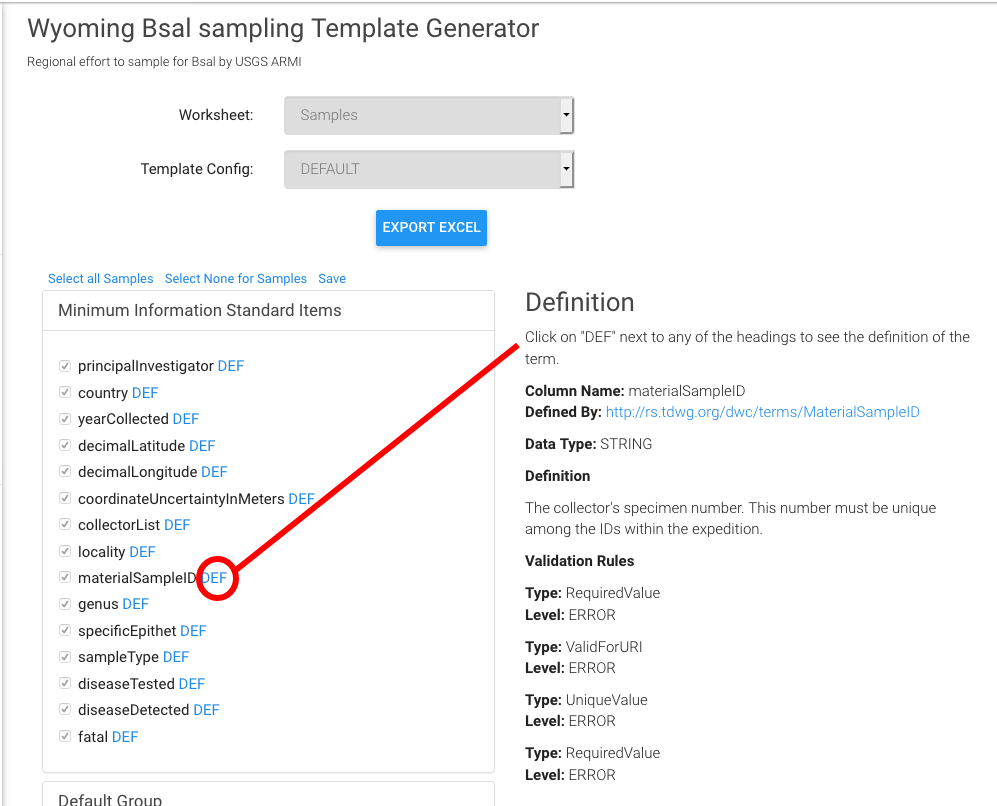
- 7. To download a template → Click on "Generate Template" on the left side of the screen.
- 8. Choose the fields you want to include in your project (minimum default fields are preselected and recommended) and then click on the blue button "Export Excel"
- Click on DEF will show its definition and validation rules. Please note that materialSampleID is the DarwinCore compliant field for a unique identifier for your samples. These may be barcodes or collector field numbers, for example, and link your field sample with lab results.
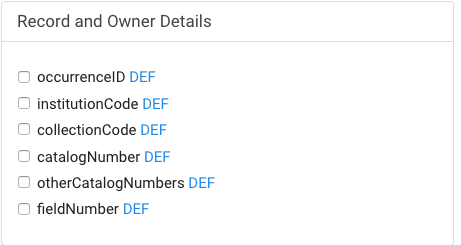
- If your dataset is based on museum vouchers or other previously cataloged specimen then include the fields for Record Details where you should click to include fields for institutionCode, collectionCode, and catalogNumber.
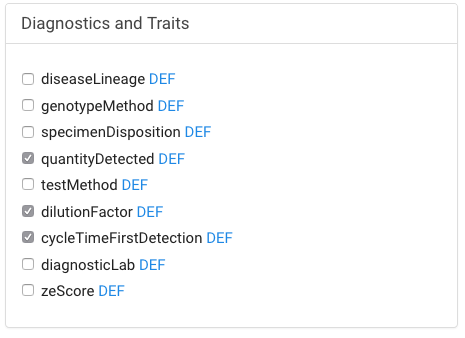
- If your dataset includes strain or lineage information, or uses a diagnosticLab not part of your institution, you may want to include additional fields.
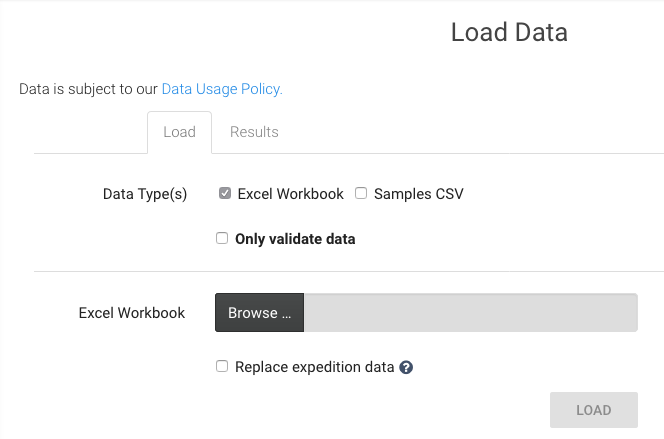
- 9. Fill out your spreadsheet using the template that you just downloaded. Instructions and sample field values are provided in the Excel file. Once you have completed filling in your dataset into the Excel Sheet called Samples, you can upload to the Project page. Again on the left menu, click on Load Data.
- If you are using the generated template (XLS) then accept the default Excel Workbook
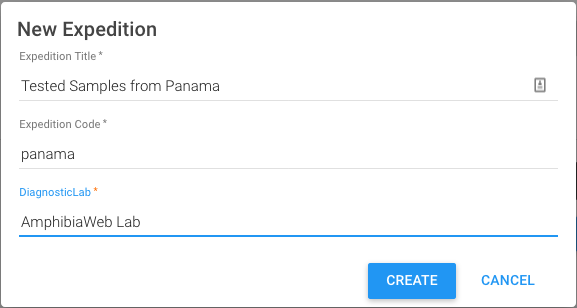
- Browse to a completed Excel workbook and you will be prompted for a few details about the dataset, which in GEOME are called ‘expeditions’
- Checking Replace expedition data will delete previous datasets and is an option for correcting or updating previously uploaded data. Use the exact same Expedition Title, Code, and DiagnosticLab as the dataset to be replaced.
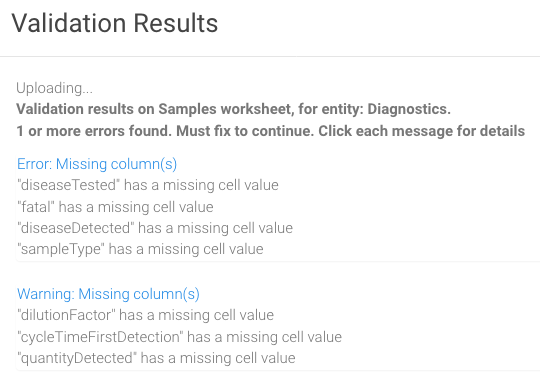
- 10. Be sure to click Load to start the validation process. When your spreadsheet is uploaded, you will see validation results or click on the tab Results. If there are errors, view the issues (expand message) and correct them before uploading the XLS file again. Example results:
Creating Projects
Generating a Template & Uploading Data
A project must already exist and your project may already have been created by the Project PI/ Contacts (steps 1-6). Ongoing projects simply have to prepare and upload datasets. In this case, follow steps 7-10:
TIP: if this is an ongoing project, use dates in the title and shortcode.
For more information, see Video Library: Instructional and Technical Presentations under GEOME's Getting Started page.
More Tips and Guidelines for the Data Fields